VideoSyncCalculator
VideoSyncCalculator is a MacOS tool for aligning different video sources into a common timeline. VideoSyncCalculator calculates the time delay between the different sources. The audio source used can also be aligned. In OBS (Open Broadcaster Software), or similar programs, use the calculated delay values as Render Delay for each source. With correct delays, all sources are synchronized.
The process
The process of calculating the delays is very simple. You must only be able to control that all sources are affected by a change in the light intensity, eg that the light in the room goes out. The process below is described for OBS, but should be similar in similar programs.
Step 1 - Create a test scene in OBS
Create a scene in OBS where all sources are visible. Organize them on the screen so you know which source is which. Add a Render Delay filter to each source and check that it is set to 0 ms. Save the scene so it can be reused for future syncronizations.
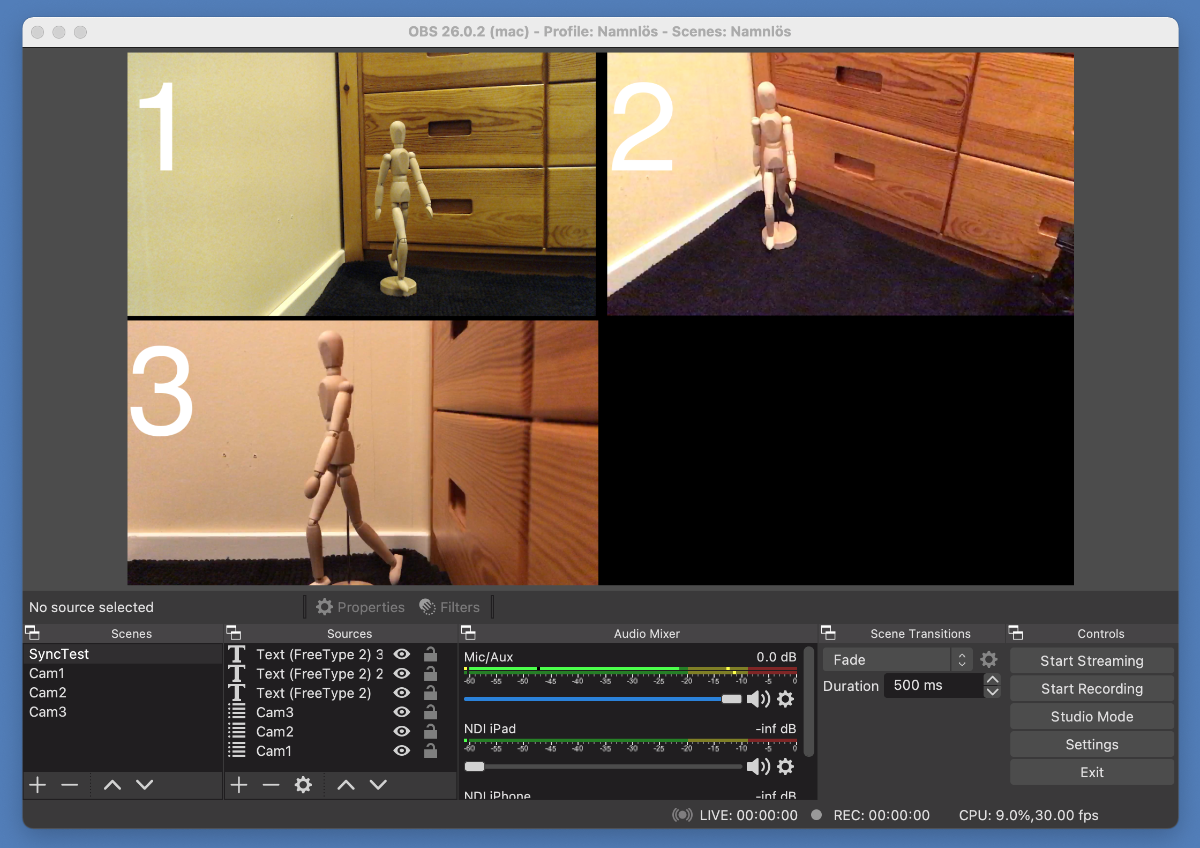
Above a scene in OBS where the various sources are laid out and noted. Render Delay is set to 0 ms for each source.
To calculate the delays between the sources, you will turn off the lighting. VideoSyncCalculator will calculate the time between the last "dark"-detected source and the other sources. For it to work, the sources must change clearly when the light goes out. Test this and redirect the sources where the change is not clear.
Step 2 - Record a short movie where you turn off the light
Create a short film (a few seconds long) in OBS, using the simple steps below:
- Turn on the light in the room
- Select the test scene in OBS
- Start recording in OBS
- Turn off the light in the room (make a loud noise at the same time as an audio sync signal, eg hit the light switch with the microphone)
- Stop recording in OBS
- Turn on the light in the room
- Remux the recorded video file to an mp4 file in OBS
The created mp4 file will now be used in VideoSyncCalculator.
Step 3 - Launch VideoSyncCalculator and import the video
Launch VideoSyncCalculator. Click the "Load video ..." button and select the video you created in step 2.
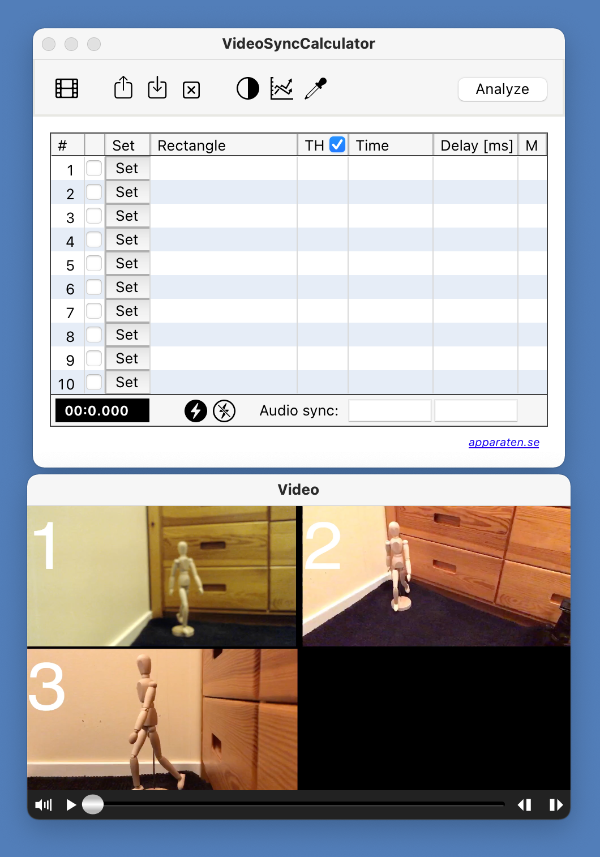
The video will open and be displayed in a window to the right of VideoSyncCalculator (in the example the video window is moved below VideoSyncCalculator). You can scale the window by right-clicking on the video.
Step 4 - Select test areas and analyze the video
VideoSyncCalculator can calculate the delay between 10 sources (you can extend it by repeating the procedure for other selected areas). A row in the VideoSyncCalculator table is linked to a test area (rectangle) that you specify in the video. Play the video and check which areas clearly changed when the light went out.
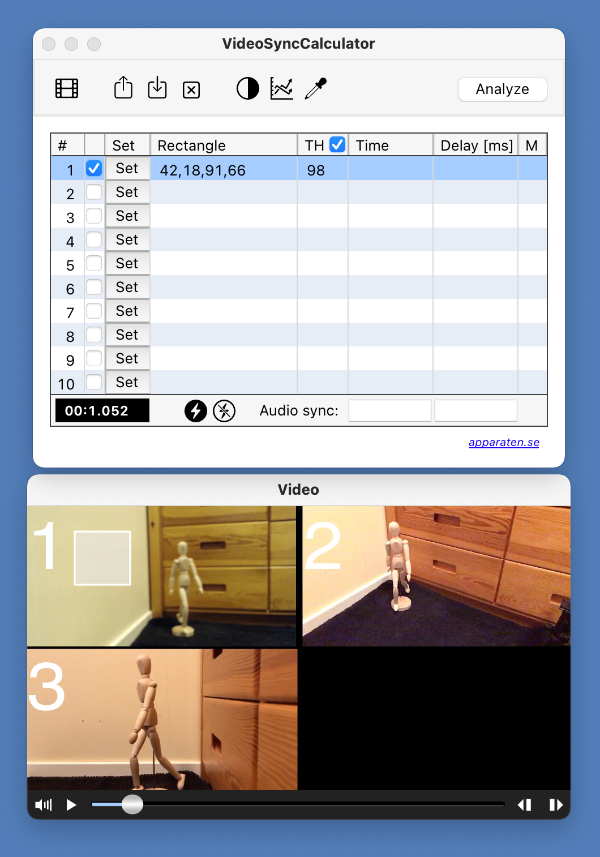
Click the "Set rect" button in the table. A crosshair will appear (see image to the right) and you can now drag a rectangle over the area that you know changed when the light went out. The local video window coordinates of the rectangle are displayed. If the TH (threshold) check box in the column header is checked, 1/2 of the average intensity value in the rectangle is set as a threshold, otherwise enter a value between 0 (completely dark) and 255 as the threshold. The test enable checkbox is automatically checked. Repeat for all areas to be tested.
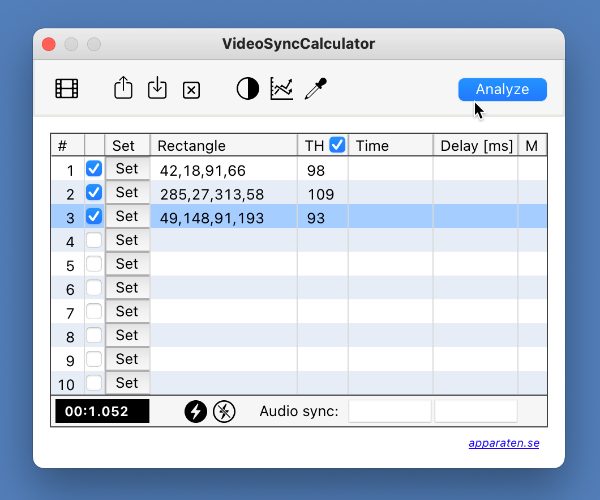
When all test rectangles are set, click the "Analyze" button. The video will be played from the current position and the mean intensity of the test rectangles will be measured for each frame. When an intensity falls below the set threshold value, the time code is saved using interframe interpolation to find the most accurate delay. When "darkness" has been detected in all activated test rectangles or when the film is finished, the delay to the last detected rectangle is calculated and displayed. You can also click the graph buttons to display the results for each frame as shown in the image belov.
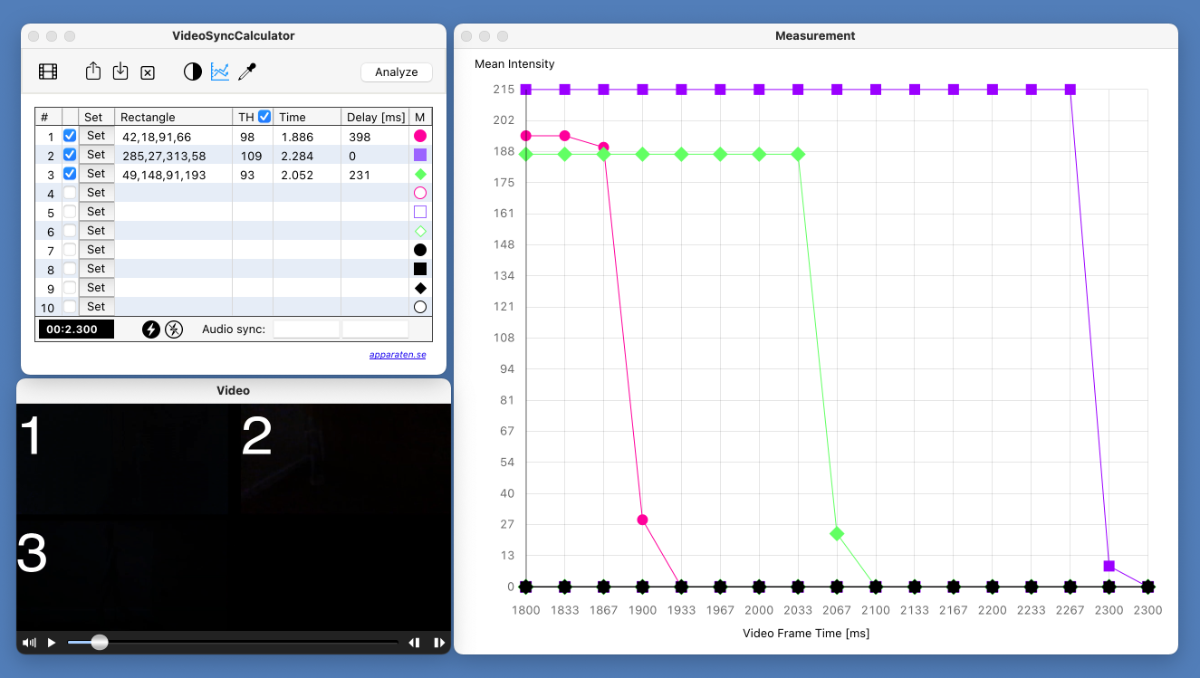
Play the video in the video window and listen for the audio sync signal. Stop playback just before the signal and right-click in the video player and select the menu item "Set audio sync". The sound delay to be specified in OBS is calculated and displayed below the Delay column.
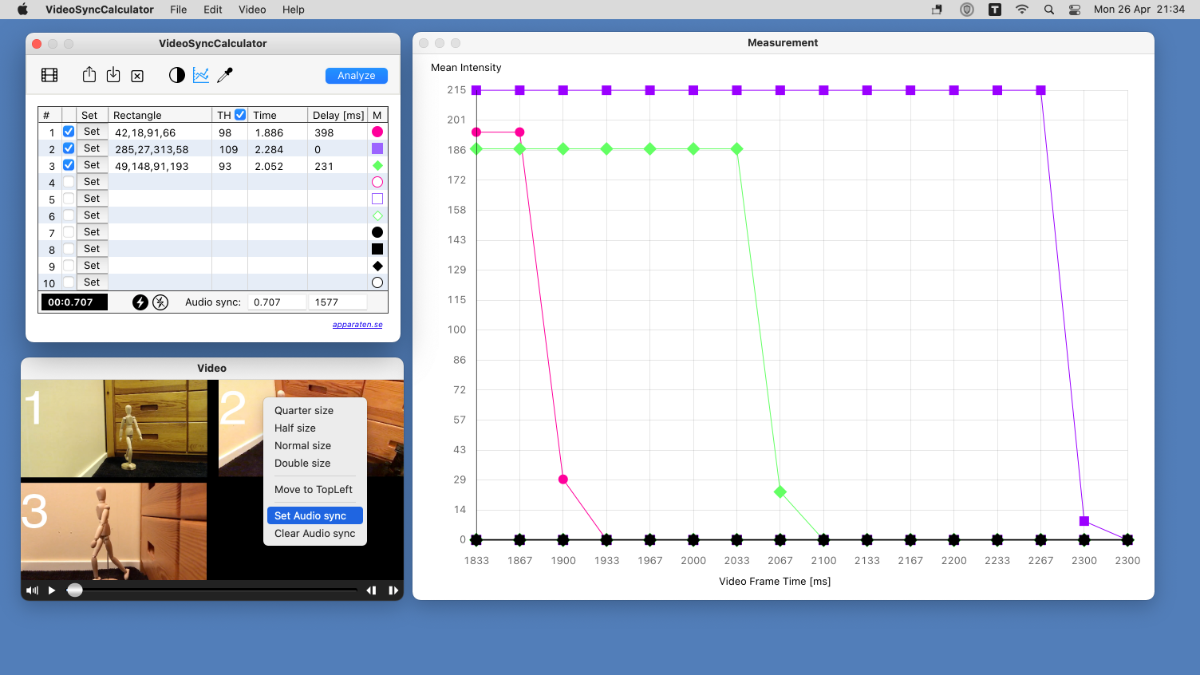
Above the results from the analysis and audio sync detection procedure. Delay corresponds to the Render Delay to be specified for the source in OBS and the audio delay the delay that should be set as "Sync offset" in the OBS "Advanced Audio Properties". You can save the analysis results to file and also load previously saved results. With the "Clear ..." button, the entire table can be cleared or only the test results.
Step 5 - Update Delay values in OBS
The final step is to fill in the analyzed delays as Render Delays in OBS. The image below shows how the analyzed delay for source 1 is set in OBS.
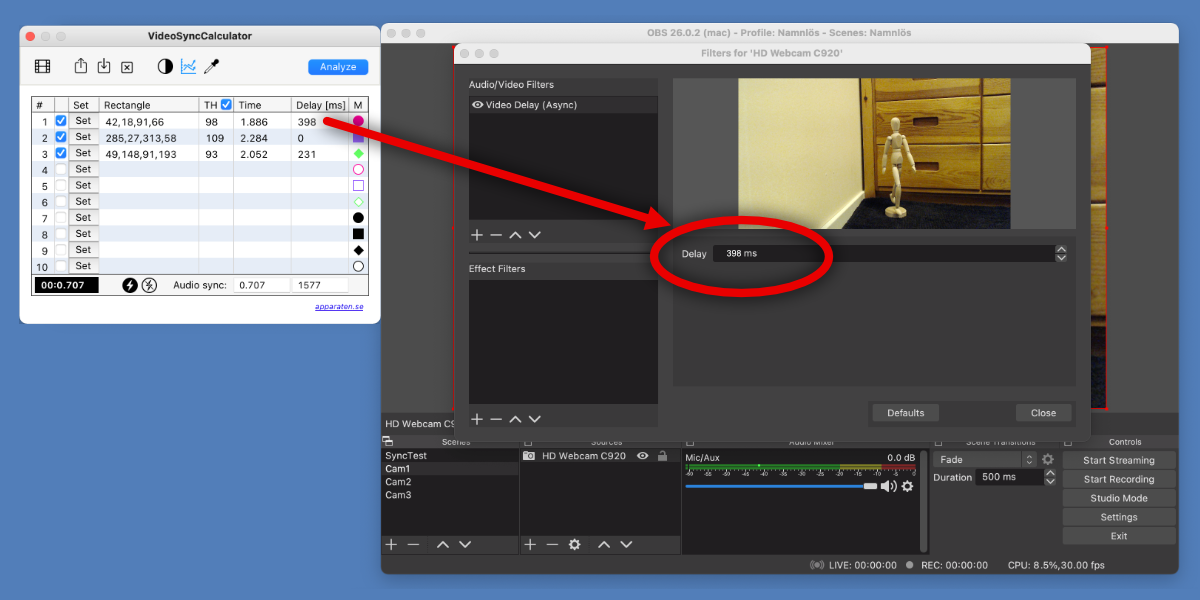
Set the Render Delay for each source and the analyzed audio delay as "Sync offset" in the OBS "Advanced Audio Properties".
Your video sources and your audio should now be in sync.